The Add Tenant section allows you to register new tenants and link them to their respective apartments and units. This ensures that all rent, utility and occupancy details are automatically associated with the correct property in the system.
Steps to Add a Tenant:
- Start by assigning House Details. Select the Apartment from the dropdown — these are the apartments you added in the Add Apartment section.
- Once you select an apartment, the Units dropdown will automatically populate with all units under that apartment. Choose the unit you want to assign to the tenant.
-
Next, fill in the Tenant Details section:
- Username – unique system username for the tenant.
- Full Name – tenant’s full name.
- Email – tenant’s valid email address.
- Phone Number – main contact number.
- Physical Address – optional, used for record-keeping.
- Postal Address – optional, for mailing or formal correspondence.
-
At the bottom of the page, you’ll find an optional Deposit Payment section.
If the tenant has already paid their deposit, fill in the following fields:
- Payable Deposit Amount – amount paid as a security deposit.
- Paymode – select payment method from dropdown options: Cash, Bank, Mpesa, or Float.
- Reference Number – enter transaction or receipt reference (if applicable).
- After filling in all required details, click Submit to save the tenant’s record and assign them to the selected apartment and unit.

Figure 1: Add Tenant form showing house details, tenant information and deposit section.
If the deposit payment details were entered during this step, the tenant will appear as fully checked-in, and the initial deposit payment step will be skipped in the Tenant Check-In/Out section. Otherwise, you can complete the deposit process later through that module.
The Tenant Check-In / Check-Out module allows you to manage all tenant-related transactions — from initial deposit and rent payments to billing, document uploads, and final check-out settlements. This section is designed to help you easily monitor each stage of the tenant’s stay within the property.
Getting Started:
Before you can perform any action, you’ll first need to locate the tenant using the Select Tenant dropdown search at the top. You can either scroll through the list or type the tenant’s name to find them quickly. Once you select the tenant, all related tabs will appear below the search bar, giving you access to various sections such as Deposit Payment, Rent Payment, Billings, Documents, and Checkout.
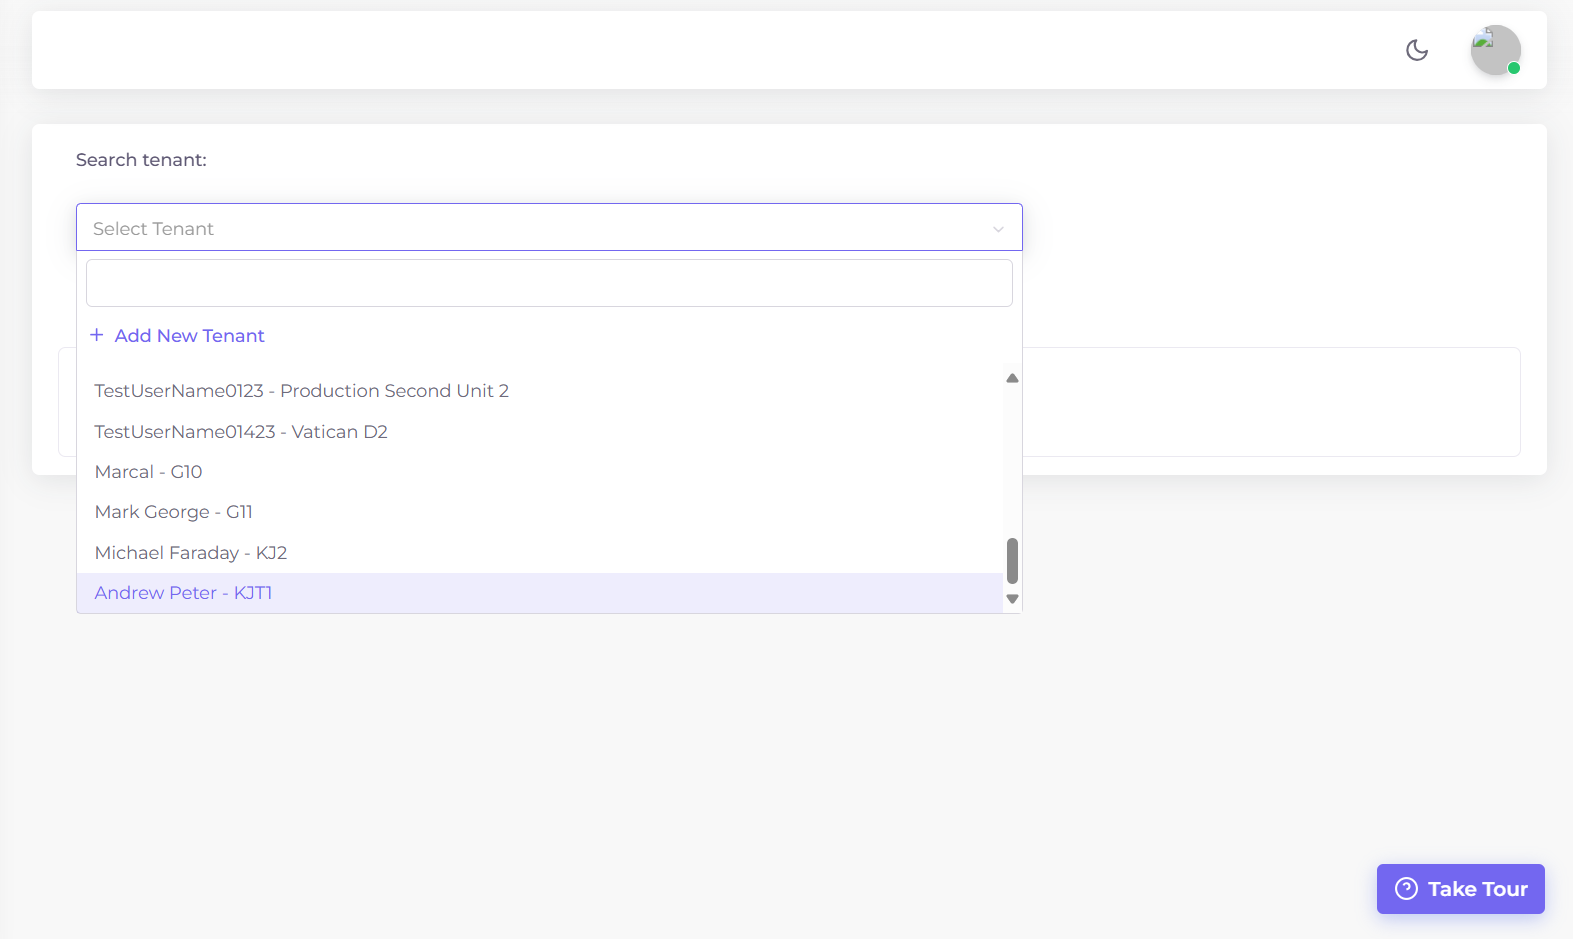
Figure 1: Select Tenant dropdown with search functionality.
If you’re new to this section or need a refresher on what each tab does, click the Take a Tour button available on the page. The guided tour will walk you through each step — from selecting a tenant to processing check-out.
1. Deposit Payment Tab
After selecting a tenant, the first tab is Deposit Payment. This section shows all the tenant’s personal details on the left — name, phone number and email — while the right side displays the payment details such as apartment name, unit name and account number. All tenant and payment details here are read-only for data integrity.
If deposit details were already filled during the Add Tenant process, you’ll see that the deposit amount was paid in full Otherwise, you’ll need to enter:
- Payable Deposit Amount – the amount being paid as a deposit.
- Paymode – select the payment method (Cash, Bank, Mpesa, or Float).
- Reference Number – enter the receipt or transaction reference.
- Check-In Date – date of payment or move-in.
After filling in all required details, click Submit to confirm the deposit.
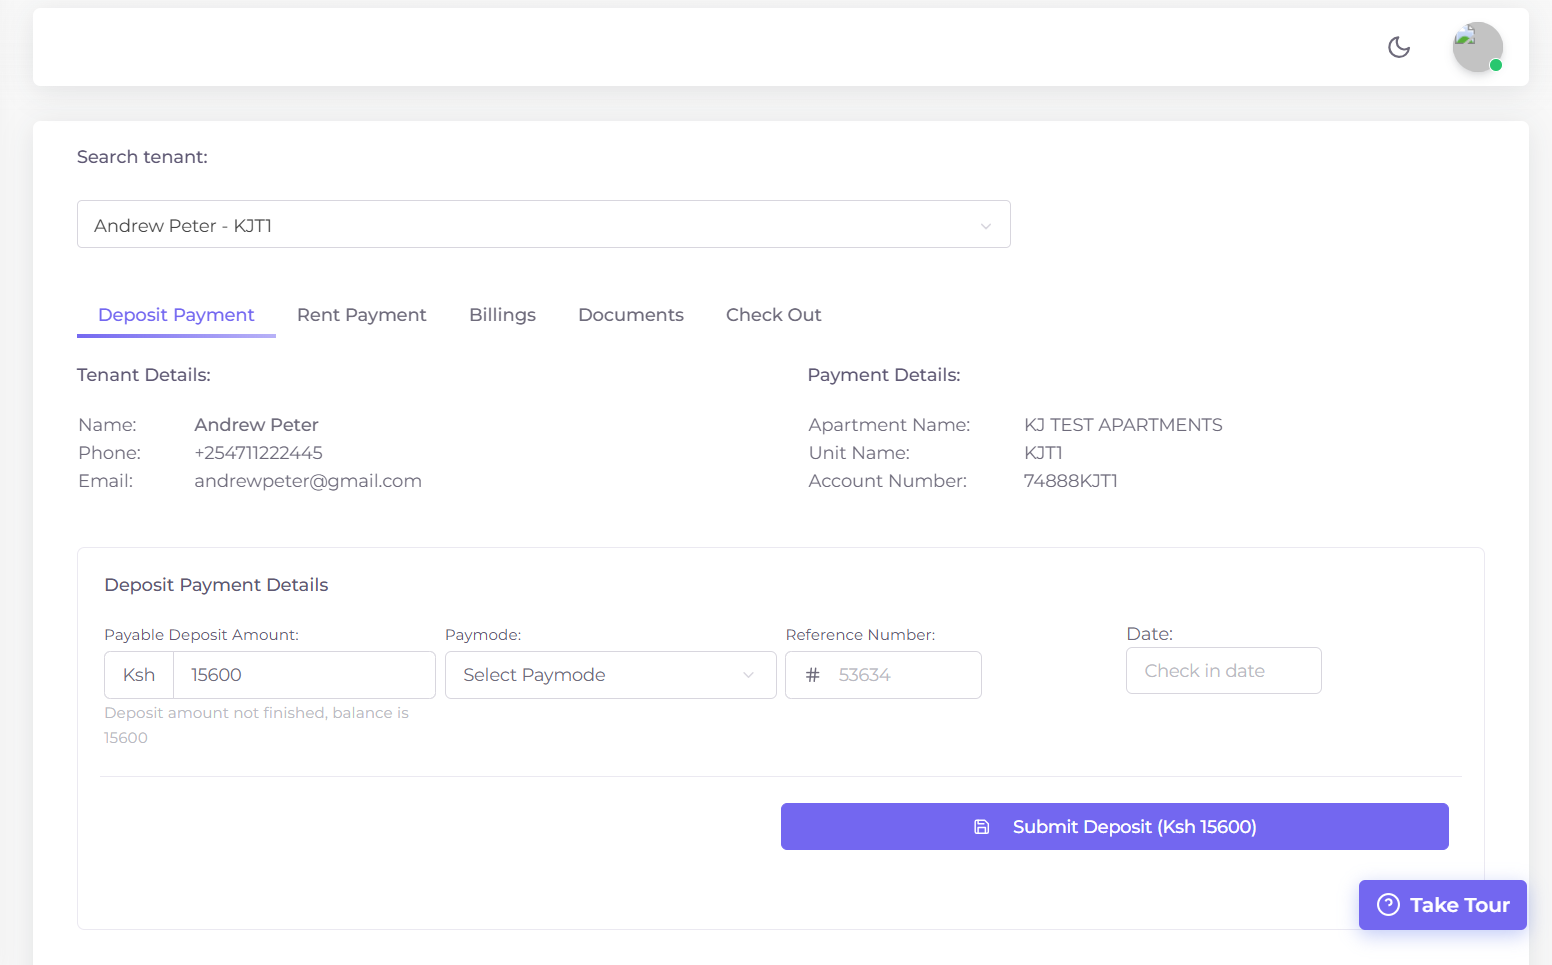
Figure 2: Deposit Payment tab showing tenant and payment details.
2. Rent Payment Tab
This tab handles rent collection and payment tracking. Just like the previous tab, tenant and payment details are automatically displayed at the top. In the lower section, you’ll find fields for recording rent payment details:
- Rent Amount – amount being paid for rent.
- Paymode – choose payment method from the dropdown.
- Reference Number – optional field for payment reference.
Click Submit to record the rent payment for that tenant.
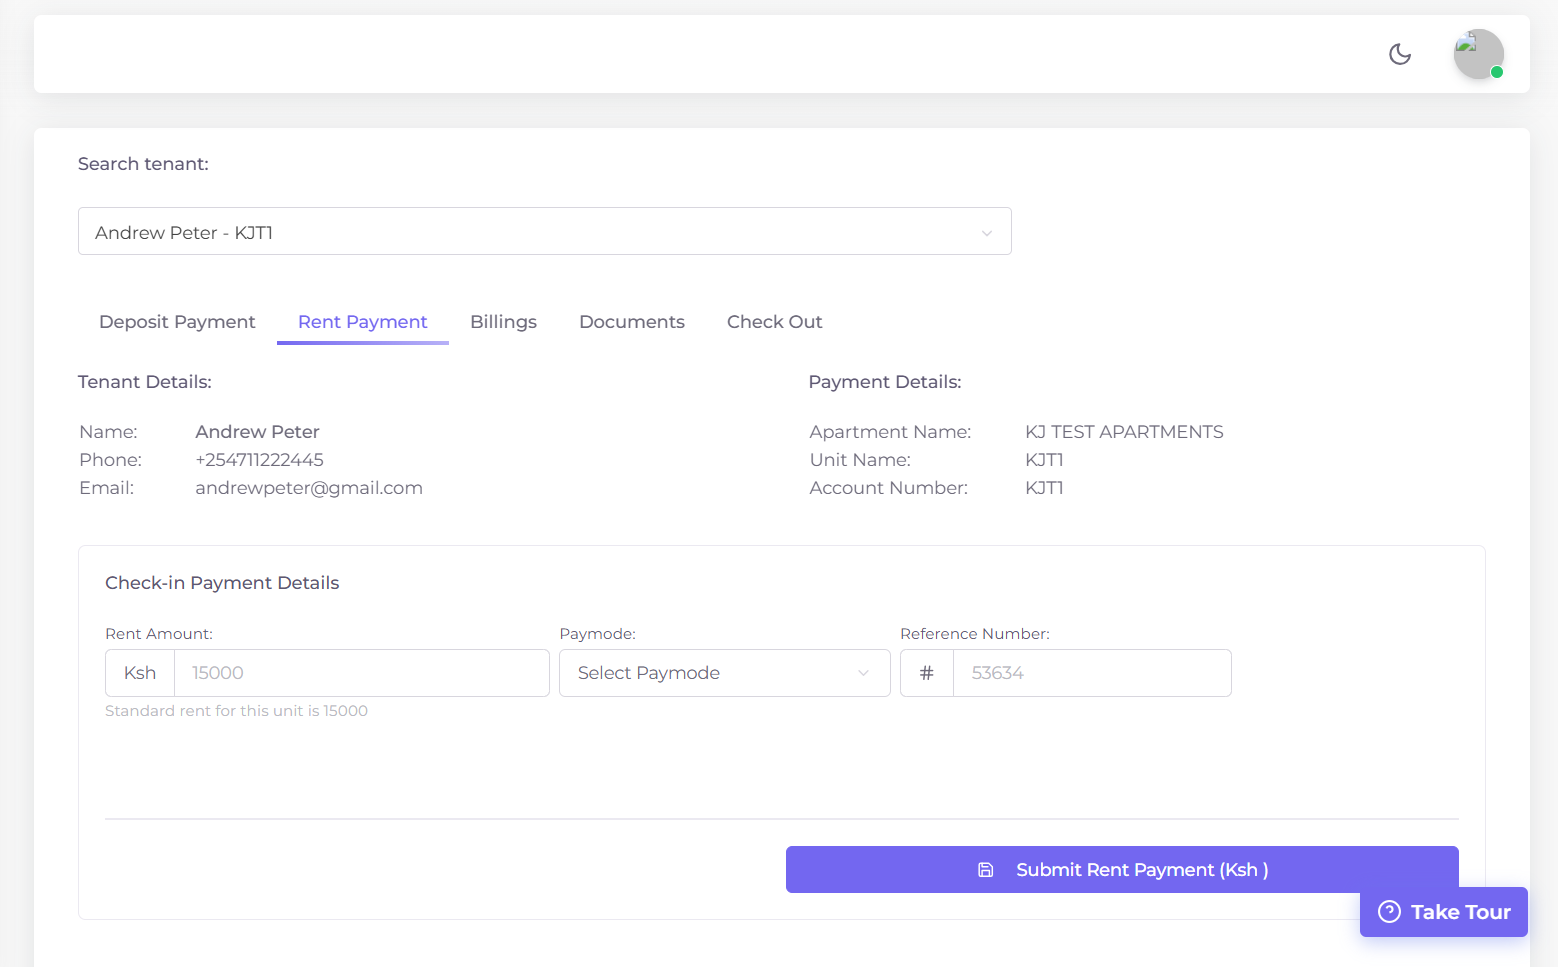
Figure 3: Rent Payment tab for recording monthly rent transactions.
3. Billings Tab
This tab allows you to record any extra charges or damages related to a tenant’s stay. All tenant and payment details remain visible at the top for context. Under the Create New Billing section, you can input:
- Amount – cost of the billed item or damage.
- Reference Number – internal or transaction reference.
- Narration – a short note explaining what the billing is for.
Once all details are entered, click Submit to save the billing record.
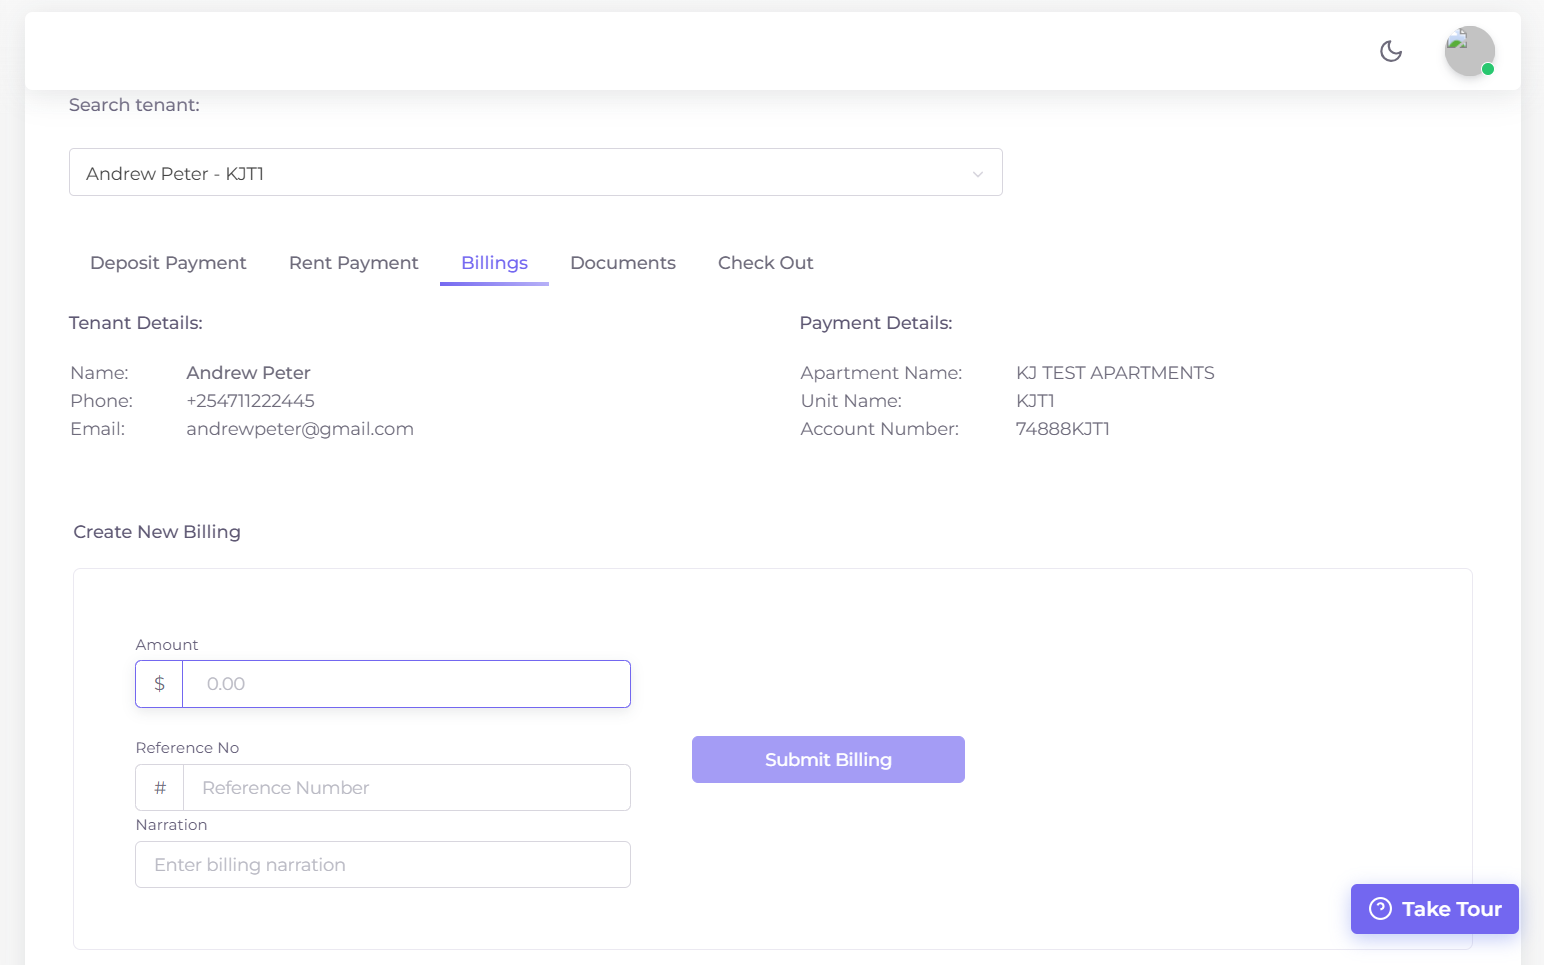
Figure 4: Billing tab for recording tenant-related charges.
4. Documents Tab
This tab is used to upload and manage tenant-related documents such as ID, passport photo or rental agreement.
To upload a document:
- Select the Document Type (e.g., ID, Contract, Photo, etc.) from the dropdown list.
- Click the Upload button and choose the file from your computer.
Once uploaded, all tenant documents remain visible in this tab for future reference.
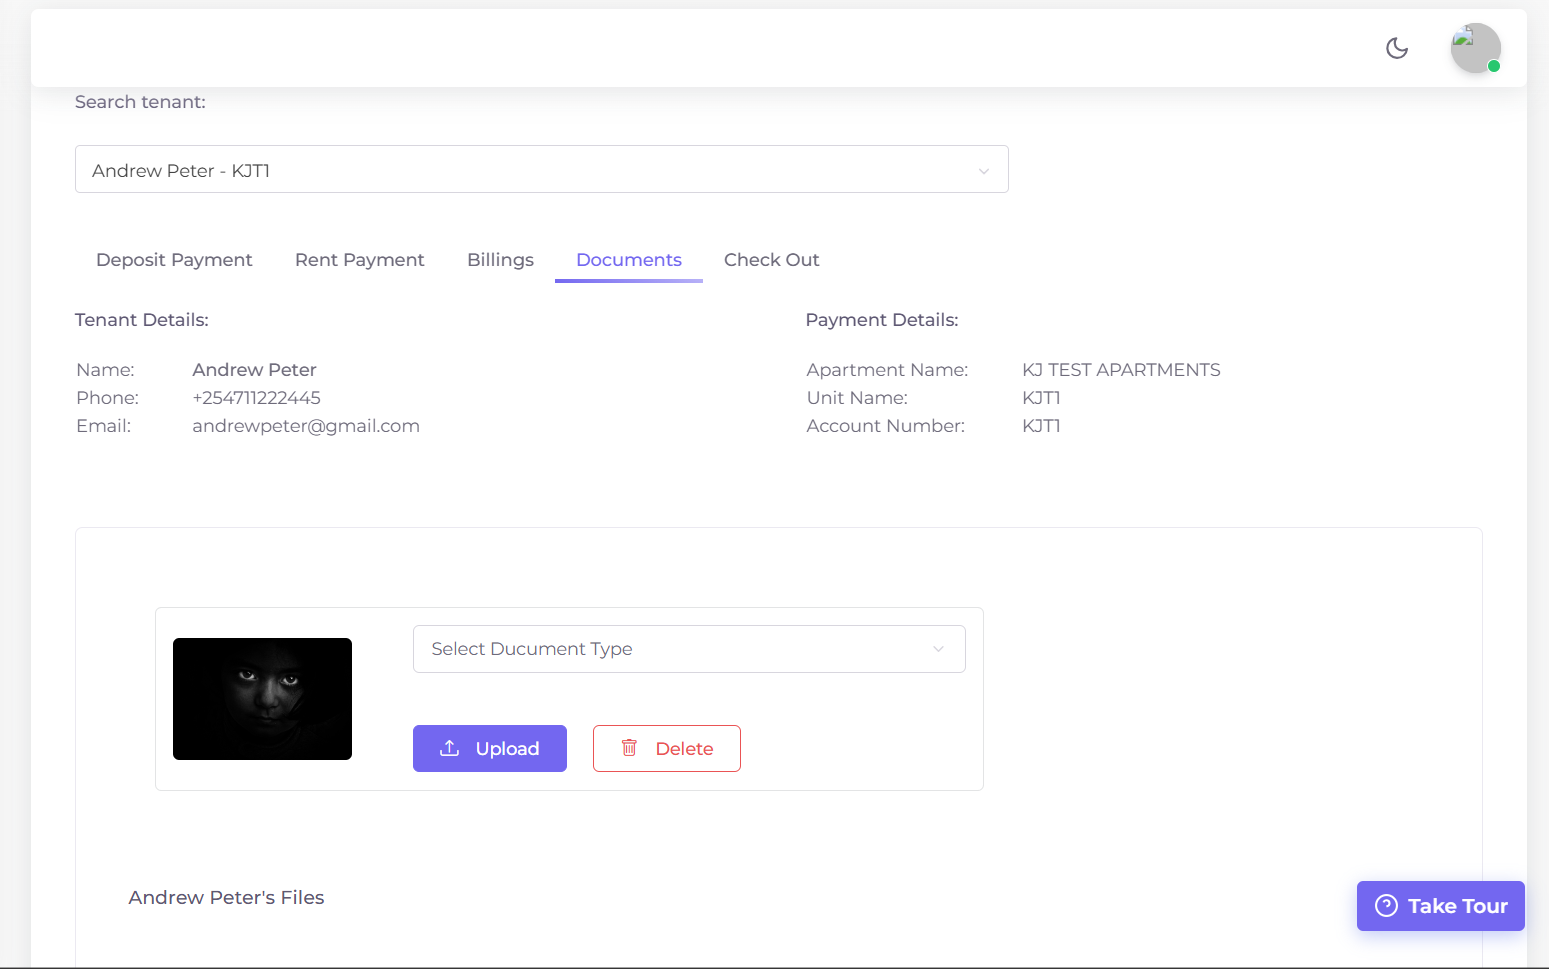
Figure 5: Documents tab showing document type dropdown and uploaded files list.
5. Checkout Tab
This is the final stage of the tenant lifecycle. The Checkout tab allows you to settle accounts, calculate balances and process refunds if necessary.
Click Prepare Tenant for Check-Out to review and settle all accounts. The system will automatically calculate the final balance:
- Green text indicates a refund is due to the tenant.
- Red text indicates the tenant owes that amount.
Depending on the result, you’ll see:
- If a refund is required — fill in the Amount, select Paymode and enter the Reference Number, then click Process Refund.
- If everything is balanced — you’ll see a message stating: "Account Settled: No payment is required in either direction."
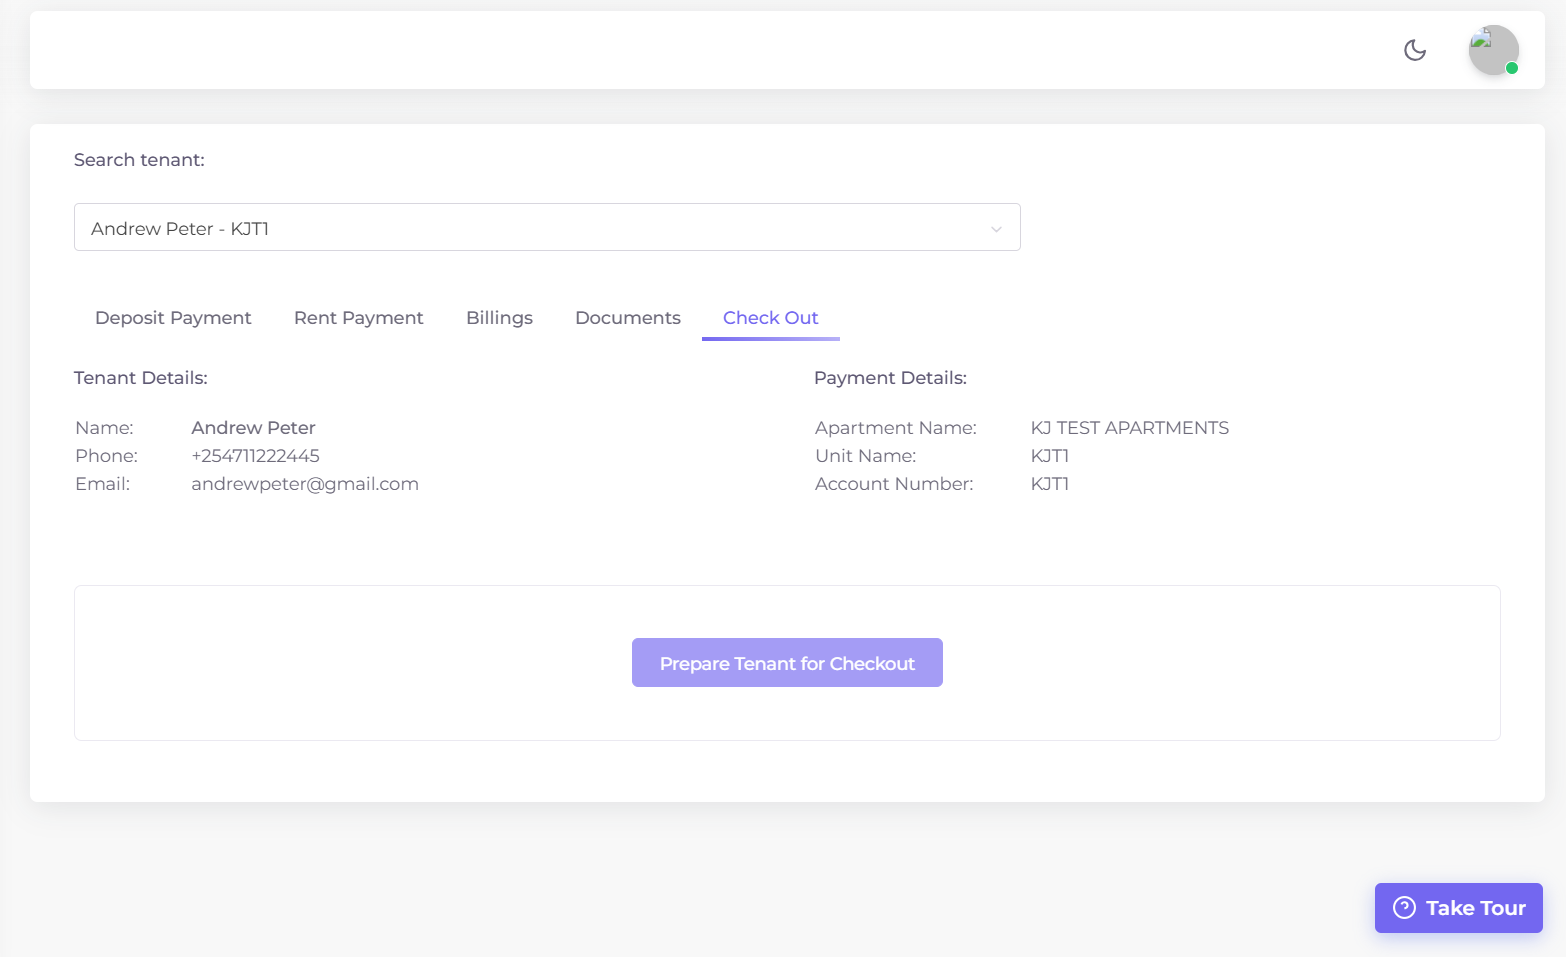
Figure 6: Checkout tab showing account settlement summary and refund options.
That’s it! With this module, you can fully manage the tenant’s entire stay from move-in to move-out while keeping all financial and documentation records organized and easy to access.
The View Tenants section displays a complete list of all registered tenants within your system. This view gives you a clear overview of every tenant currently added, their contact details, and the apartment and unit they occupy. The data is displayed in an interactive DataTable that supports search, sorting and pagination for easier navigation and management.
Table Overview:
Each row in the tenants table represents a registered tenant with the following columns:
- Tenant Name – Full name of the tenant as entered during registration.
- Email – The tenant’s registered email address.
- Phone – Tenant’s contact number.
- Apartment – Name of the apartment the tenant resides in.
- Unit – Specific unit assigned to the tenant within the selected apartment.
- Status – Indicates whether the tenant is Active or Inactive.
-
Actions – Includes quick action buttons such as:
- Edit – Update tenant details in case of registration errors.
- Deactivate – Temporarily disable the tenant record if needed.
Search and Filter Options:
You can easily find any tenant using the search bar above the table. The search scans across all key fields — Tenant Name, Email, Phone Number, Apartment and Unit allowing you to locate the right tenant even if you only remember partial information (e.g., phone number or email).
Additionally, you can choose how many entries to display per page using the Show Entries dropdown — options include 10, 25, 50, or 100 tenants per page.
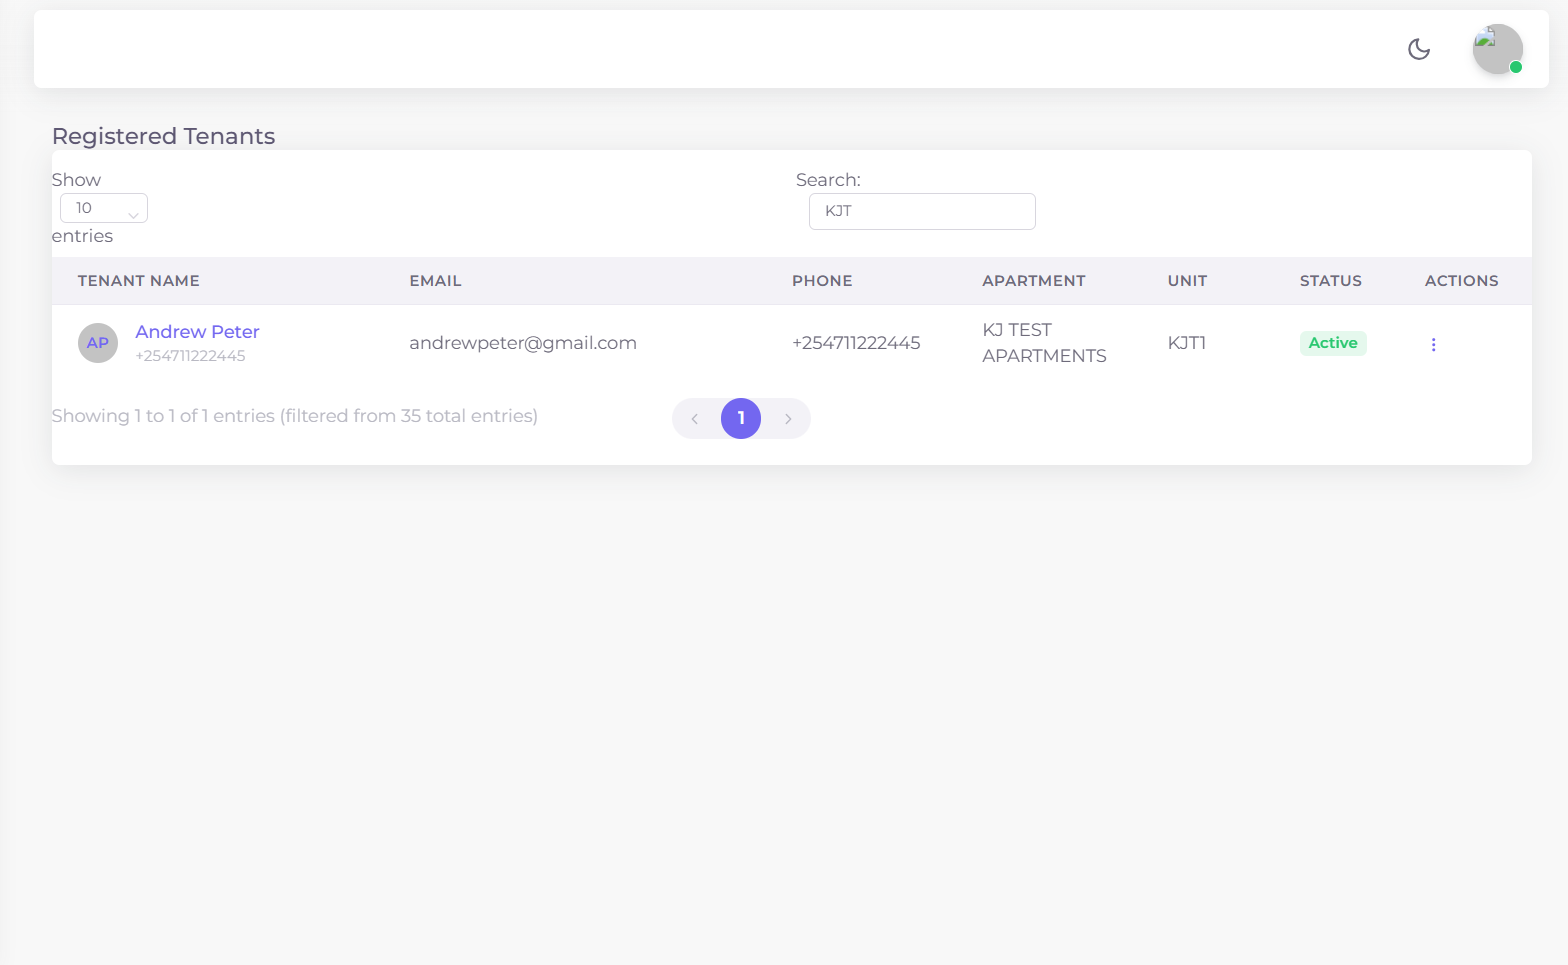
Figure 1: View Tenants page showing the full tenants list with search, filters, and action buttons.
This section provides a central place for tenant management, making it easy to review records, edit incorrect entries and monitor tenant statuses across all your apartments.