The User Operations section in Kejarent allows administrators to manage all system users efficiently. It provides tools for viewing user accounts, updating details and assigning roles such as Teacher, Director, Admin or Supervisor. This ensures proper access control and accountability within the system.
Administrators can easily track active users, modify account statuses, and customize permissions — maintaining a secure and organized user management process.
View Users
Displays all system users in a searchable DataTable. Administrators can edit user details as needed.
- Username
- Phone Number
- IsActive – User account status
- Actions – Edit user
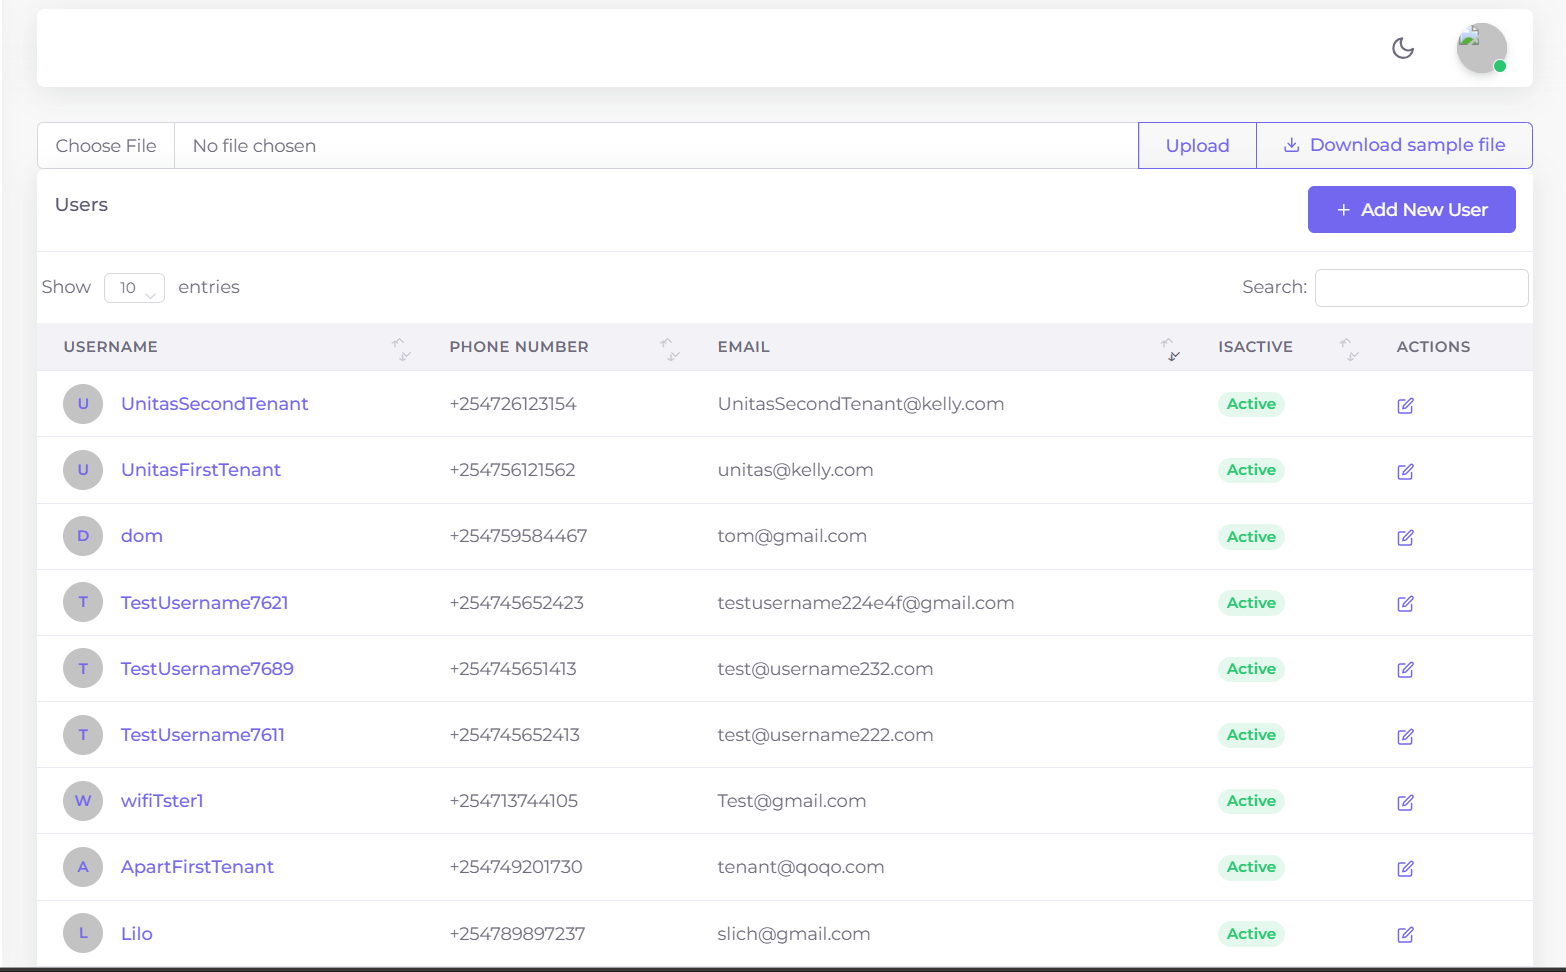
Figure 1: User management DataTable showing all system users.
User Roles
Assign or modify roles for system users (Teacher, Director, Admin, Supervisor).
- Each user is displayed in a card format.
- Select a role from the dropdown.
- Click Submit to save role changes.
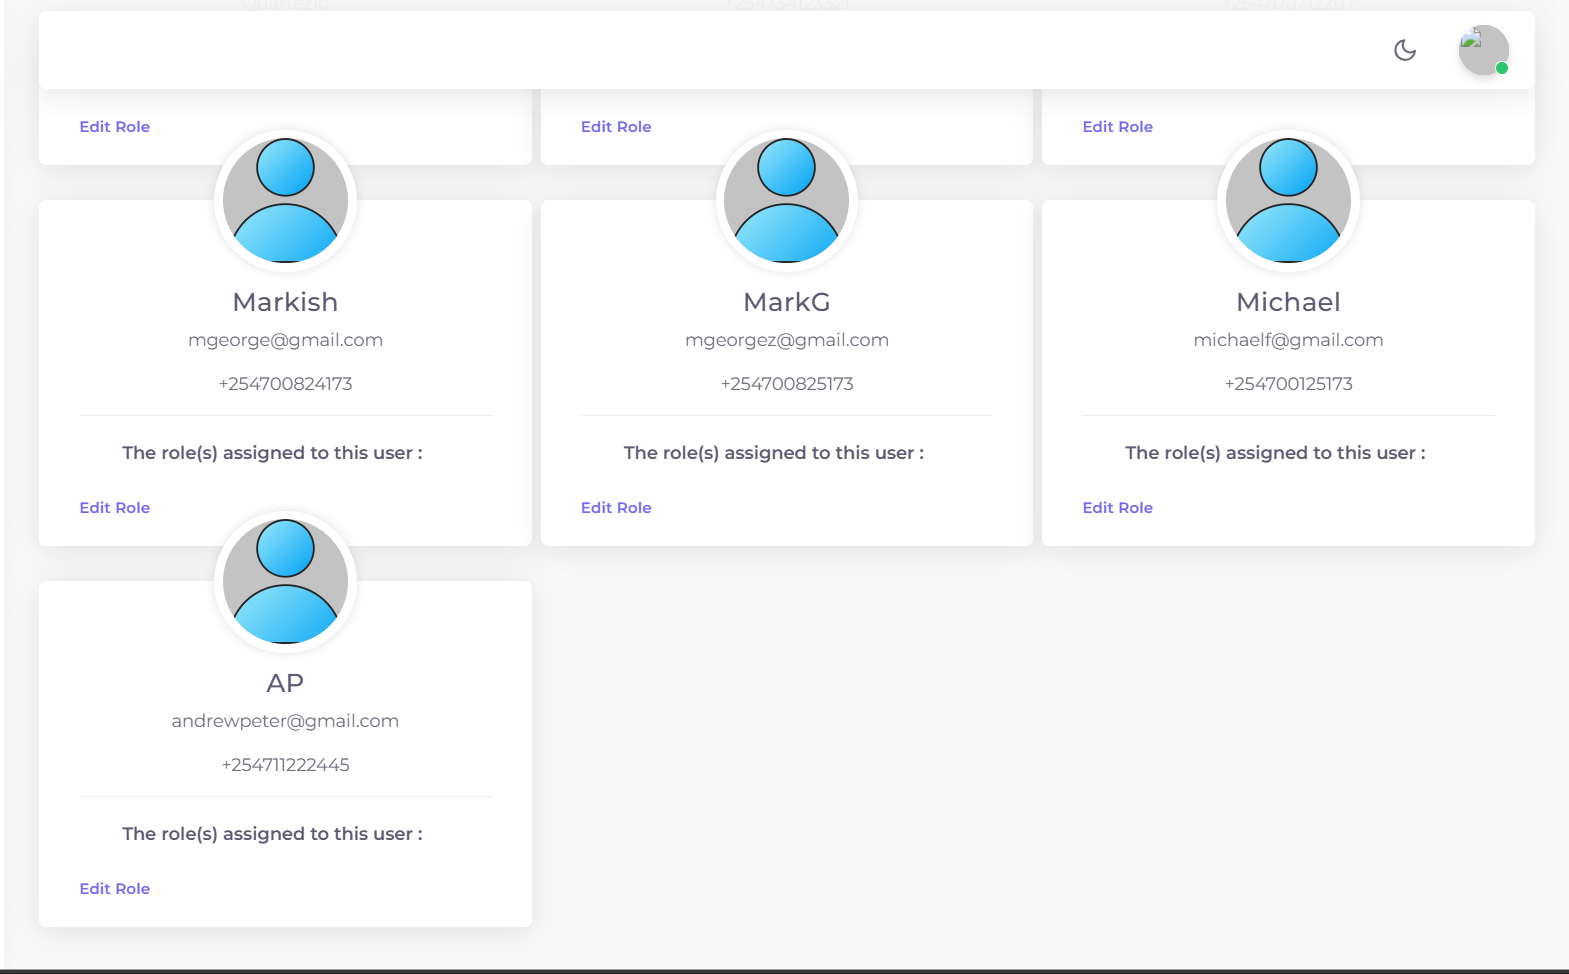
Figure 2: User role management cards.
The Organization Management section helps administrators manage the entire business structure within Kejarent. It includes tools for registering and viewing child companies, tracking employees and monitoring company billing activities.
This section ensures that all entities — from parent organizations to subsidiaries and individual employees — are properly documented, billable and aligned under the same operational framework.
Child Companies
Add New Company
Form to register a new company. Fill all required fields to add a company.
- Company Name, Username, Physical Address, Email, Phone, P.O Box (optional)
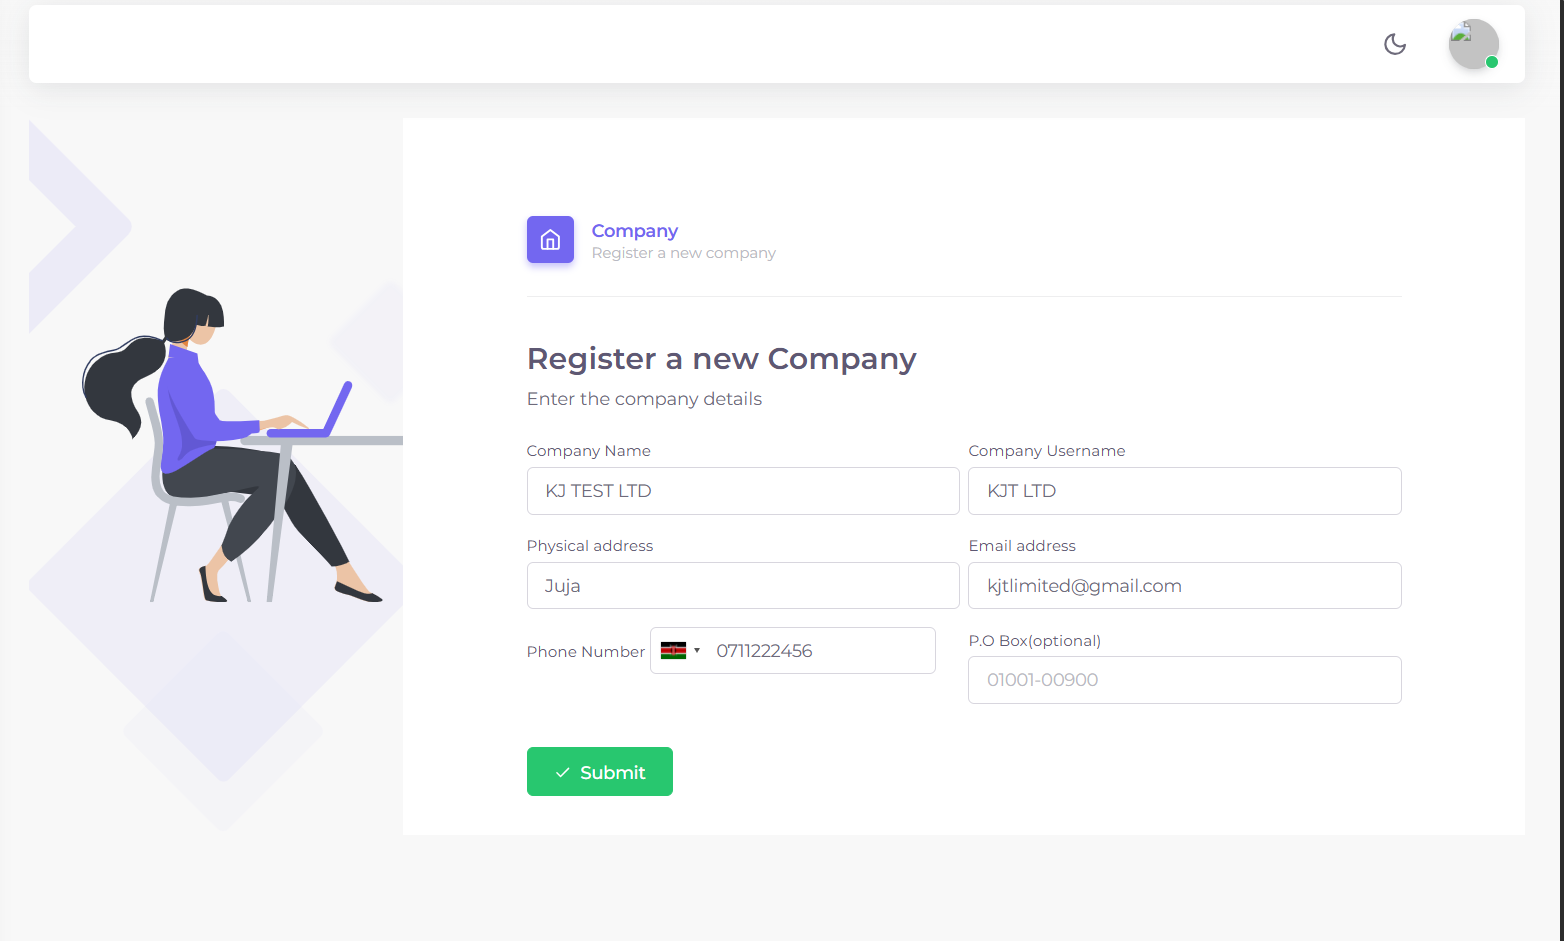
Figure 3.1: Add new company form.
View Companies
List of all registered companies in a DataTable.
- Company Name, Email, Phone, Physical Address, Status, Actions (update details)
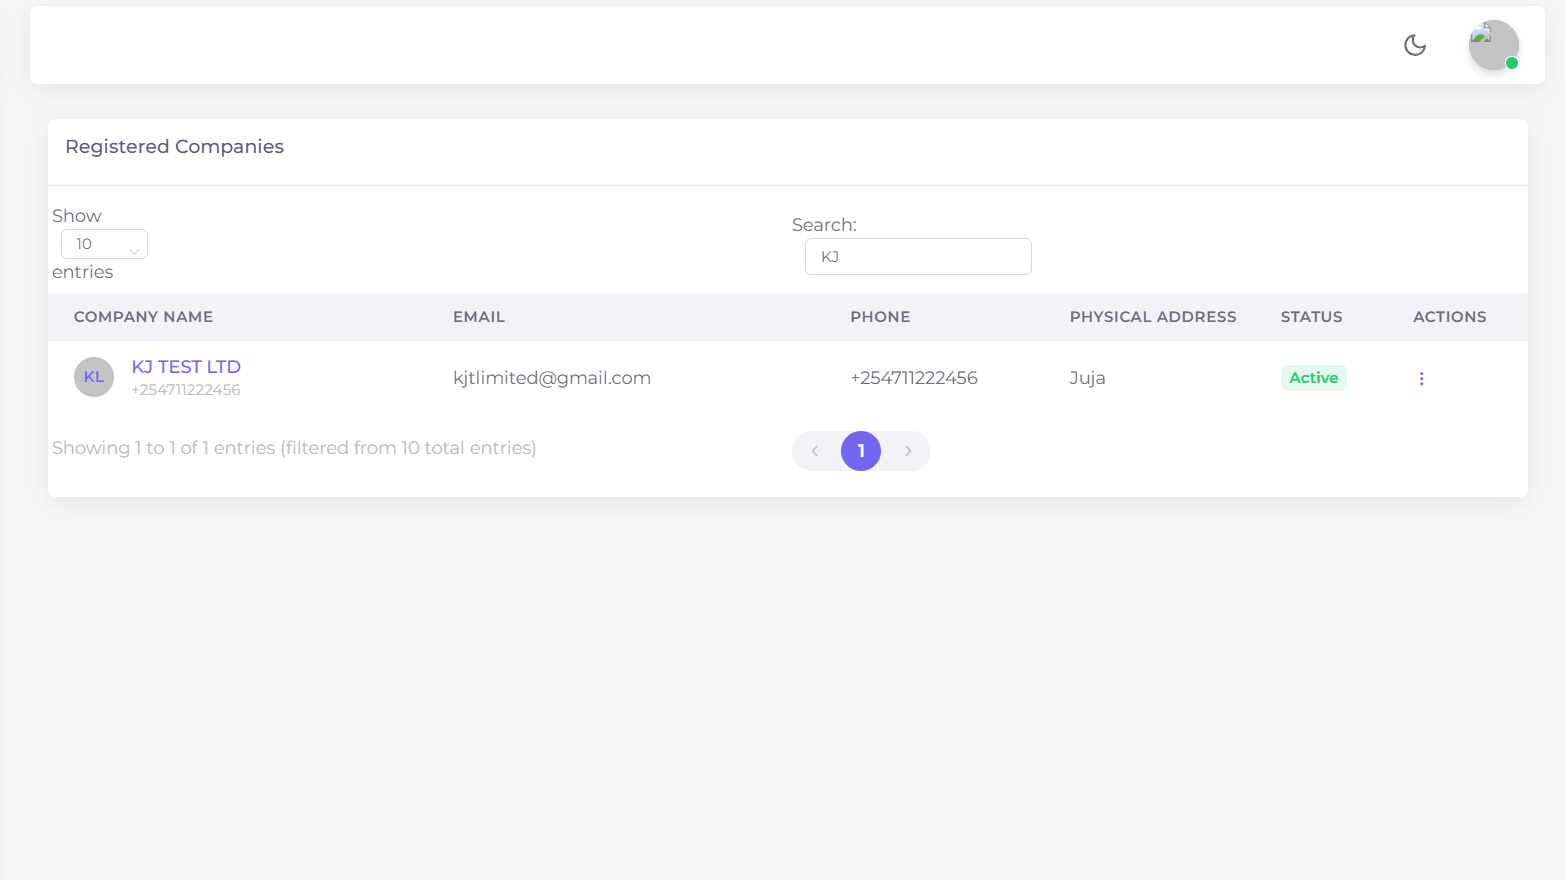
Figure 3.2: Companies DataTable.
Company Billings
Financial summary per company with filters for account type, payment mode, and date range.
- Select Company, Total Consumption, Total Collection, Select Account Type, From/To Date
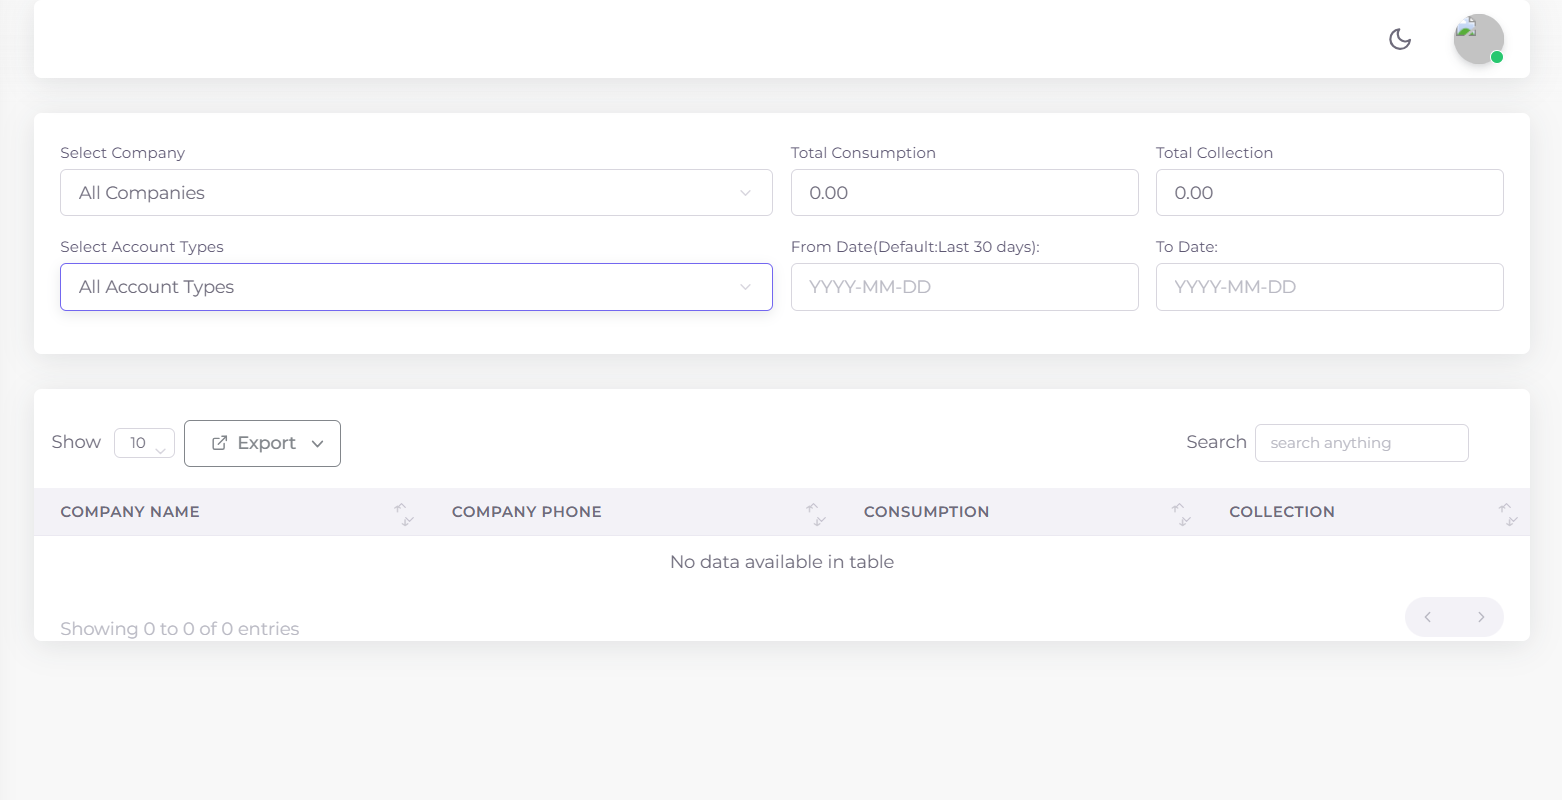
Figure 3.3: Company billing DataTable.
Employees
View Employees
Displays all employees in a DataTable with edit options.
- Name, Contacts, Employee Number, Address, Status, Actions (edit)

Figure 3.4: Employees DataTable.
Register Employee
Form to add a new employee into the system.
- Username, Full Name, Email, Phone, Physical Address, Postal Address
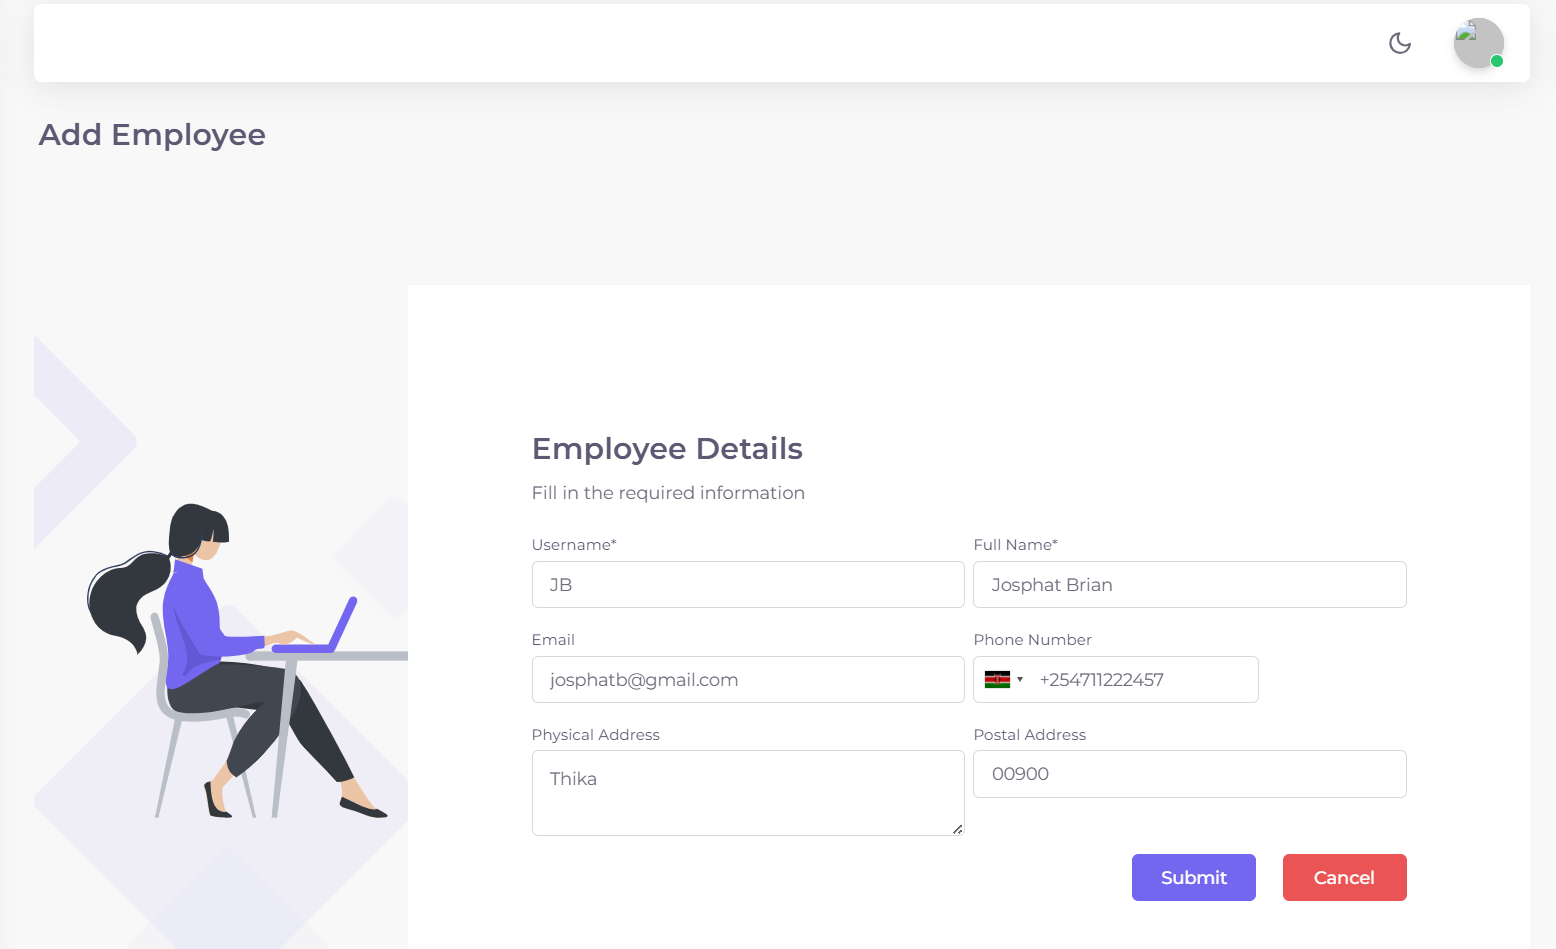
Figure 3.5: Register Employee form.
The System Settings section provides configuration options for administrators to customize payment methods, account rates and account activity statuses. It ensures that all financial and operational rules align with the organization’s needs.
Here, administrators can set up Mpesa Paybills, bank accounts, define collection rates and manage account activation across apartments — streamlining financial setup and maintenance.
Set Payment Methods
This section allows administrators to configure payment options for each apartment using cards.
- Mpesa Paybill
- Bank Account
- Send Money
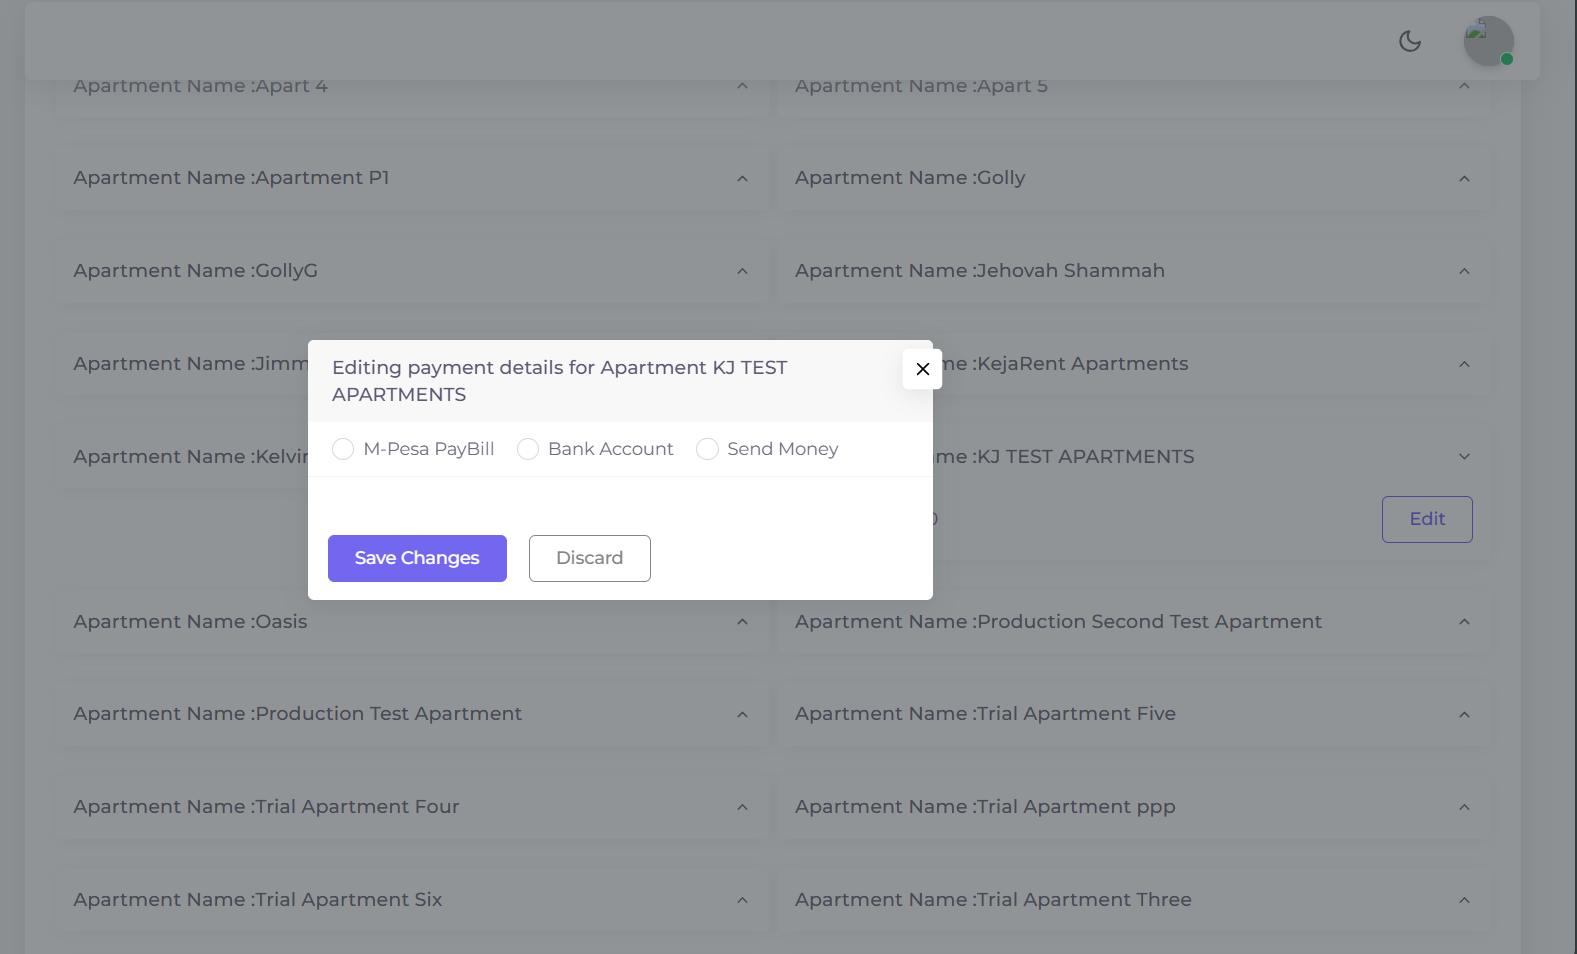
Figure 4.1: Payment methods configuration for apartments.
Set Account Rates
Configure account rates, payment setups and entity configurations for each type of account.
- Define rates per account type
- Set up payment collection configurations
- Manage entity-specific settings
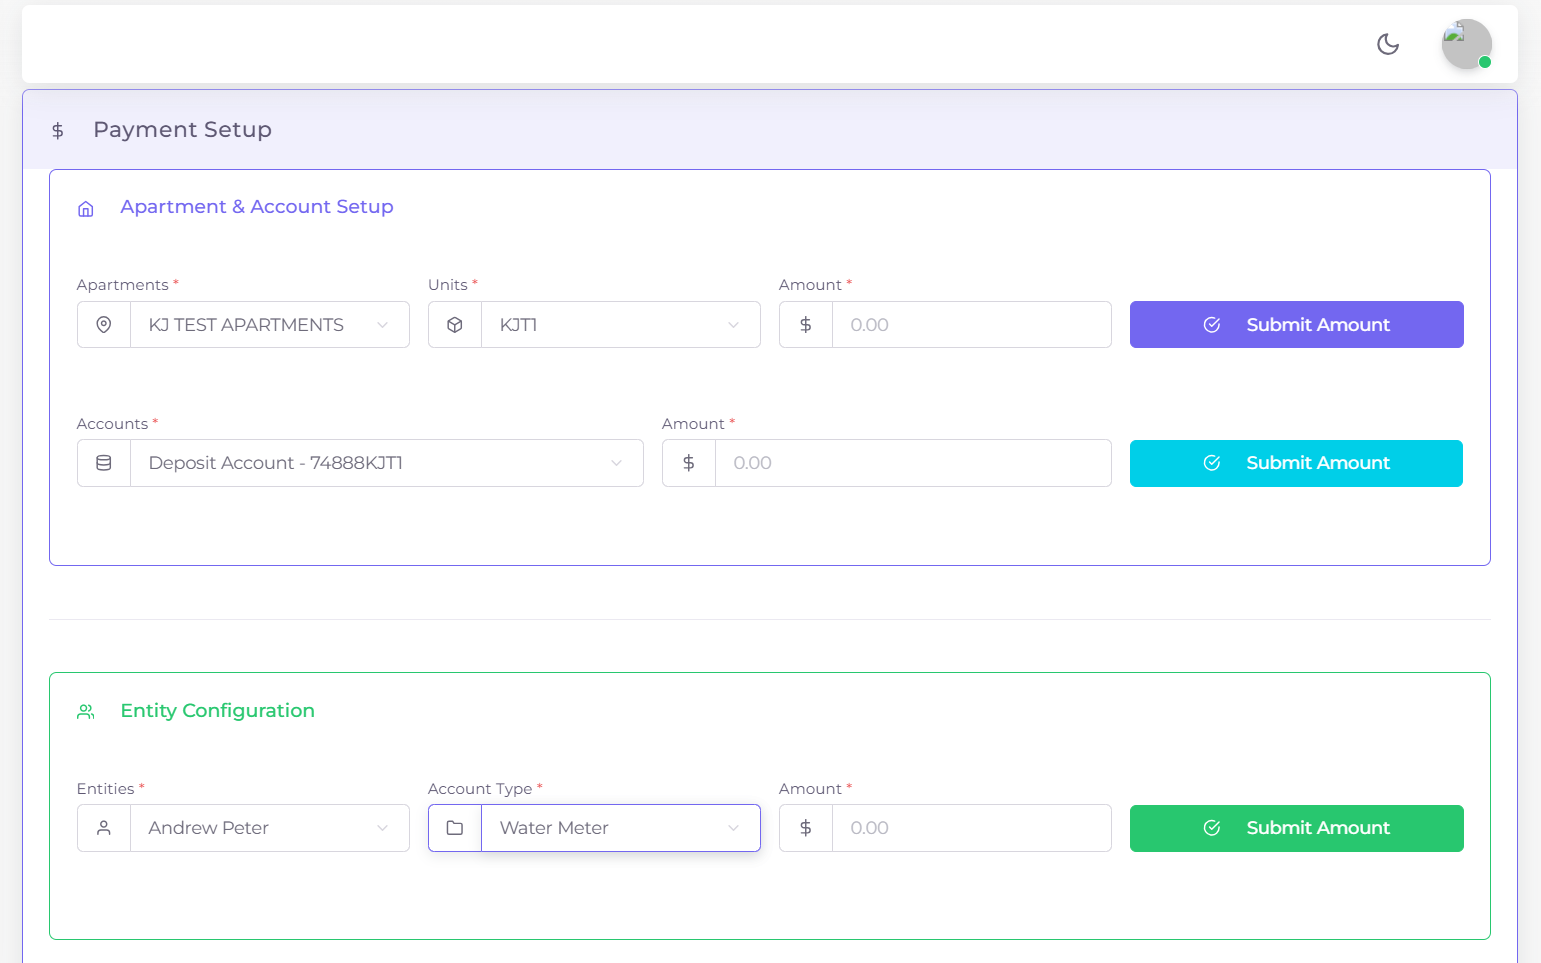
Figure 4.2: Account rates and payment setup configuration.
Deactivate Accounts
Filter and manage accounts by status and type, then activate or deactivate from the list.
- Select Account Status (Active / Inactive)
- Select Account Type
- View accounts in a list showing Apartment, Account, Status and Actions (Activate/Deactivate)
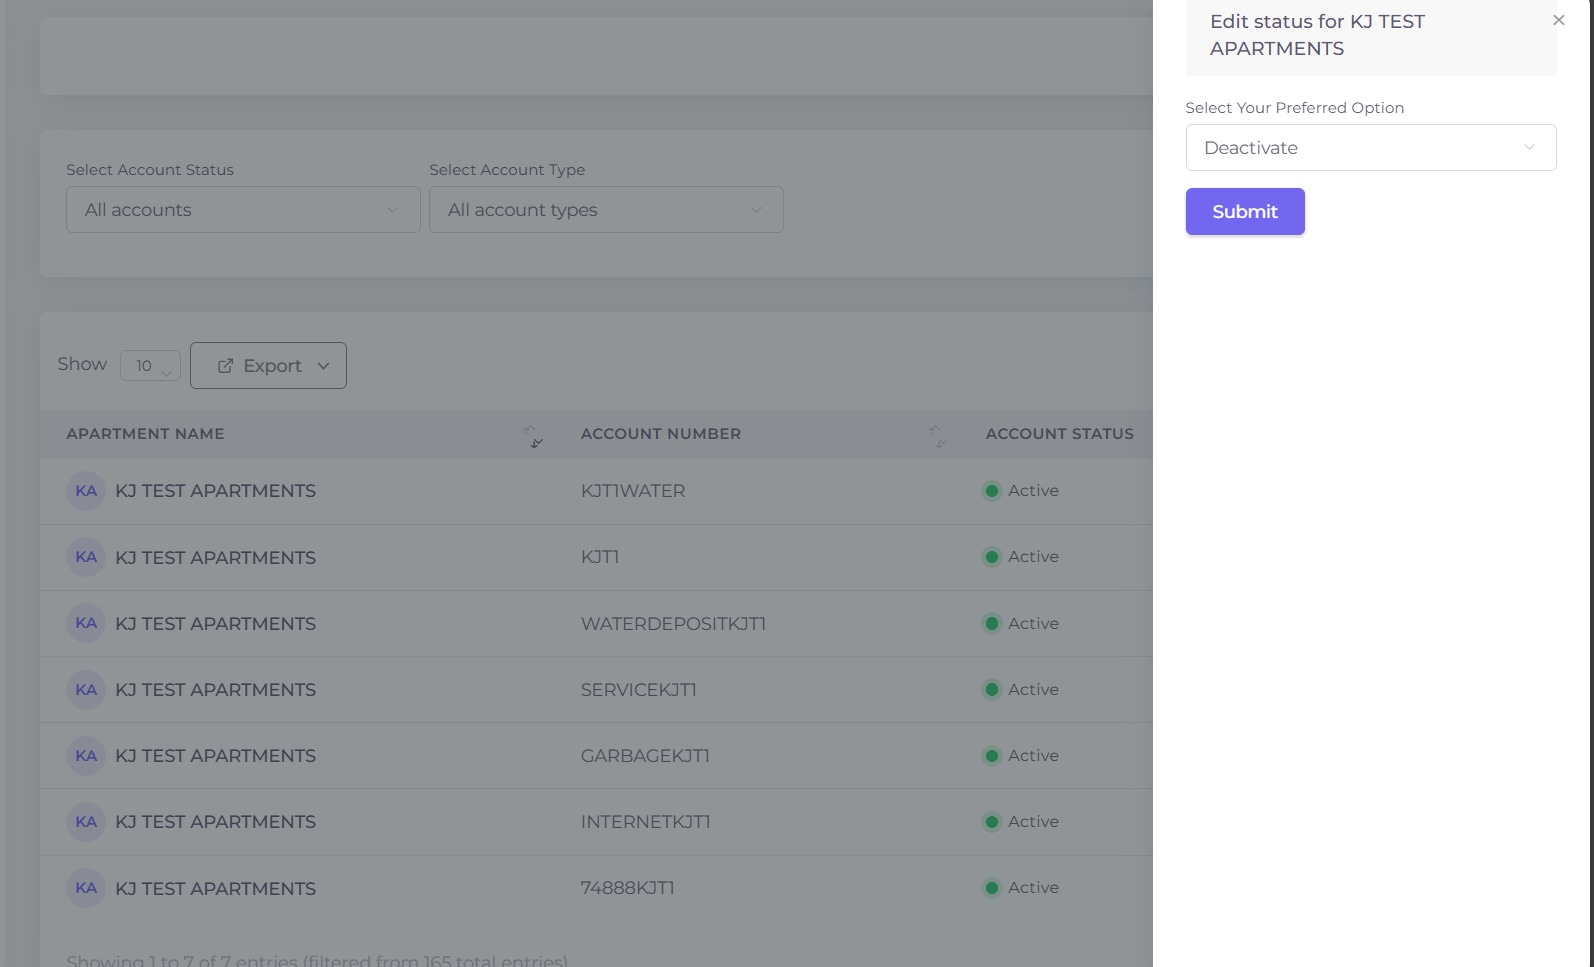
Figure 4.3: Activate or deactivate accounts for apartments.